Each year we send out back orders of kūmara tupu to members all over New Zealand. Growing kūmara is clearly very popular so we wanted to detail how our kūmara grower, Joseph Land, grows his kūmara each year.
Kūmara growing begins in late August when the Lands plant the beds, called tāpapa, for growing the kūmara tupu. Tupu are rooted shoots which grow from the parent kūmara and can be pinched off and planted out to form a kūmara plant. The tāpapa is made with free draining, coarse river sand which prevents the kūmara rotting in the Spring rain, and only has a small amount of nutrients, so doesn’t support lots of weed growth.
Kūmara need heat to stimulate the growth of the tupu. One year they used lawn clippings from the Marae under only half of the tāpapa and found that these kūmara sprouted about a week to 10 days earlier than the ones with no clippings. 6 inches of horse manure under the gravel will do the same thing.
Unlike commercial kūmara growers, who cover their beds with plastic, Joseph leaves his beds uncovered. Usually there is enough rain to provide the moisture required, but if they have a dry spell they do water to keep the sand moist, otherwise the kūmara won’t sprout.
The first shoots start to appear after about three weeks, and most varieties then start to quickly develop lots of shoots so that by early October there are lots of tall shoots. Some varieties are slower to start producing tupu, so in early October the growth across the tāpapa will be patchy and uneven but by late October, when the planting out starts, the growth will be even across the beds.
The kūmara tupu are pulled off the parent tubers for planting. Because Joseph supplies lots of people with kūmara tupu for planting he wants to make sure that he grows the best, disease free kūmara that he can. Rather than planting out rooted tupu (as most people do) he cuts the tupu about half an inch above the last white roots and then plants these un-rooted tupu out. This keeps his kūmara clean and disease free, and means they keep very well. Planting cut tupu out means the plants require extra watering for the first few days. In the past, when Joseph has planted rooted tupu, he watered the newly planted shoots only once. The cut tupu are relatively pampered and will receive three or four waterings to support the new roots to develop.
I asked Joseph what he means by “clean” kūmara. He described that kūmara can have a fungal disease which causes them to develop skin blemishes which can result in the skin being cracked and rough. This looks unpleasant, produces wastage when eating them (as they need peeling rather than scrubbing), and also reduces their storage. Some varieties seem to be more susceptible to this, and Joseph is working hard to ensure he has clean seed kūmara of all varieties every year.
The tupu are planted in the standard commercial spacing of rows 30 inches apart, and the plants about 12 inches apart within the row. The Lands use a horse drawn furrower to make ridges and furrows, and plant the kūmara along the top of the ridges. The plants are watered for the first few days, and then the only other input up until harvesting is weeding. They have adapted the horse drawn scarifier to weed along the rows without disturbing too much of the soil on the ridge sides and so that they don’t damage the roots of the developing kūmara plants. They weed around the plants at the top of the ridges by hand and later, when the runners are nearing the bottom of the furrows, they will go back along the rows with the scarifier for the second and final weeding.
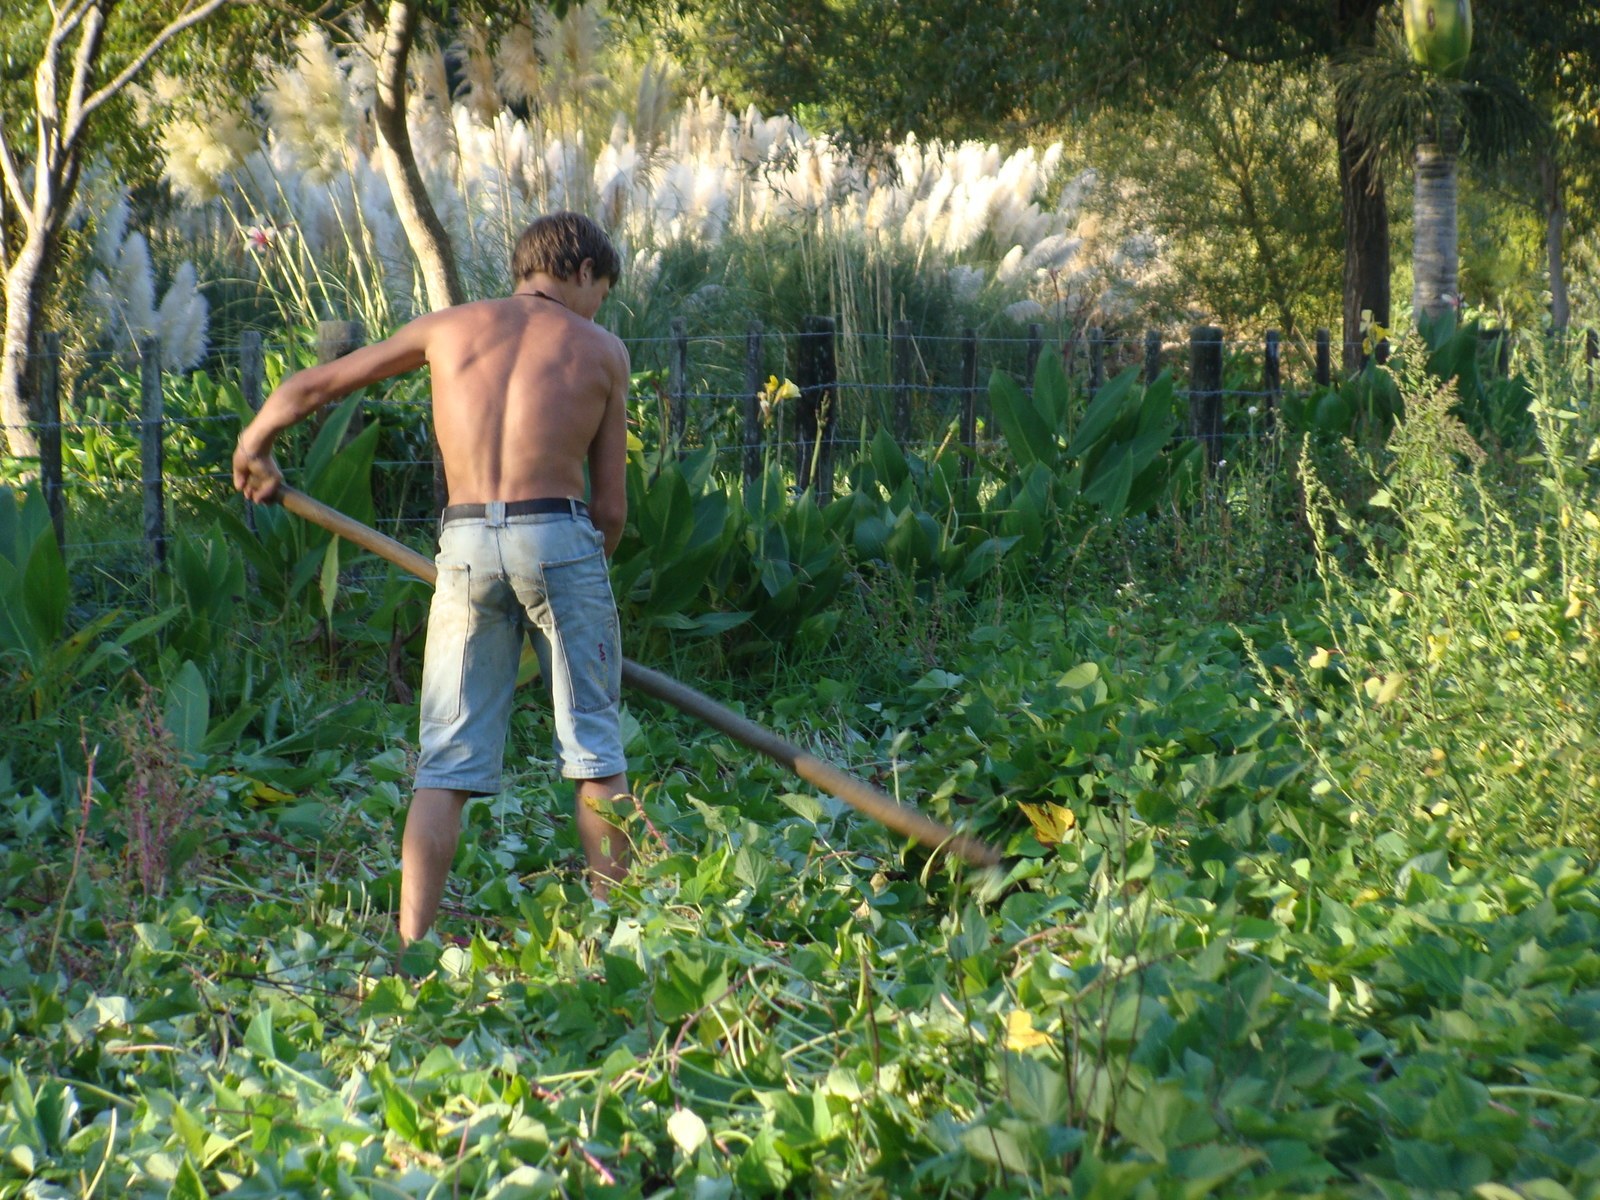
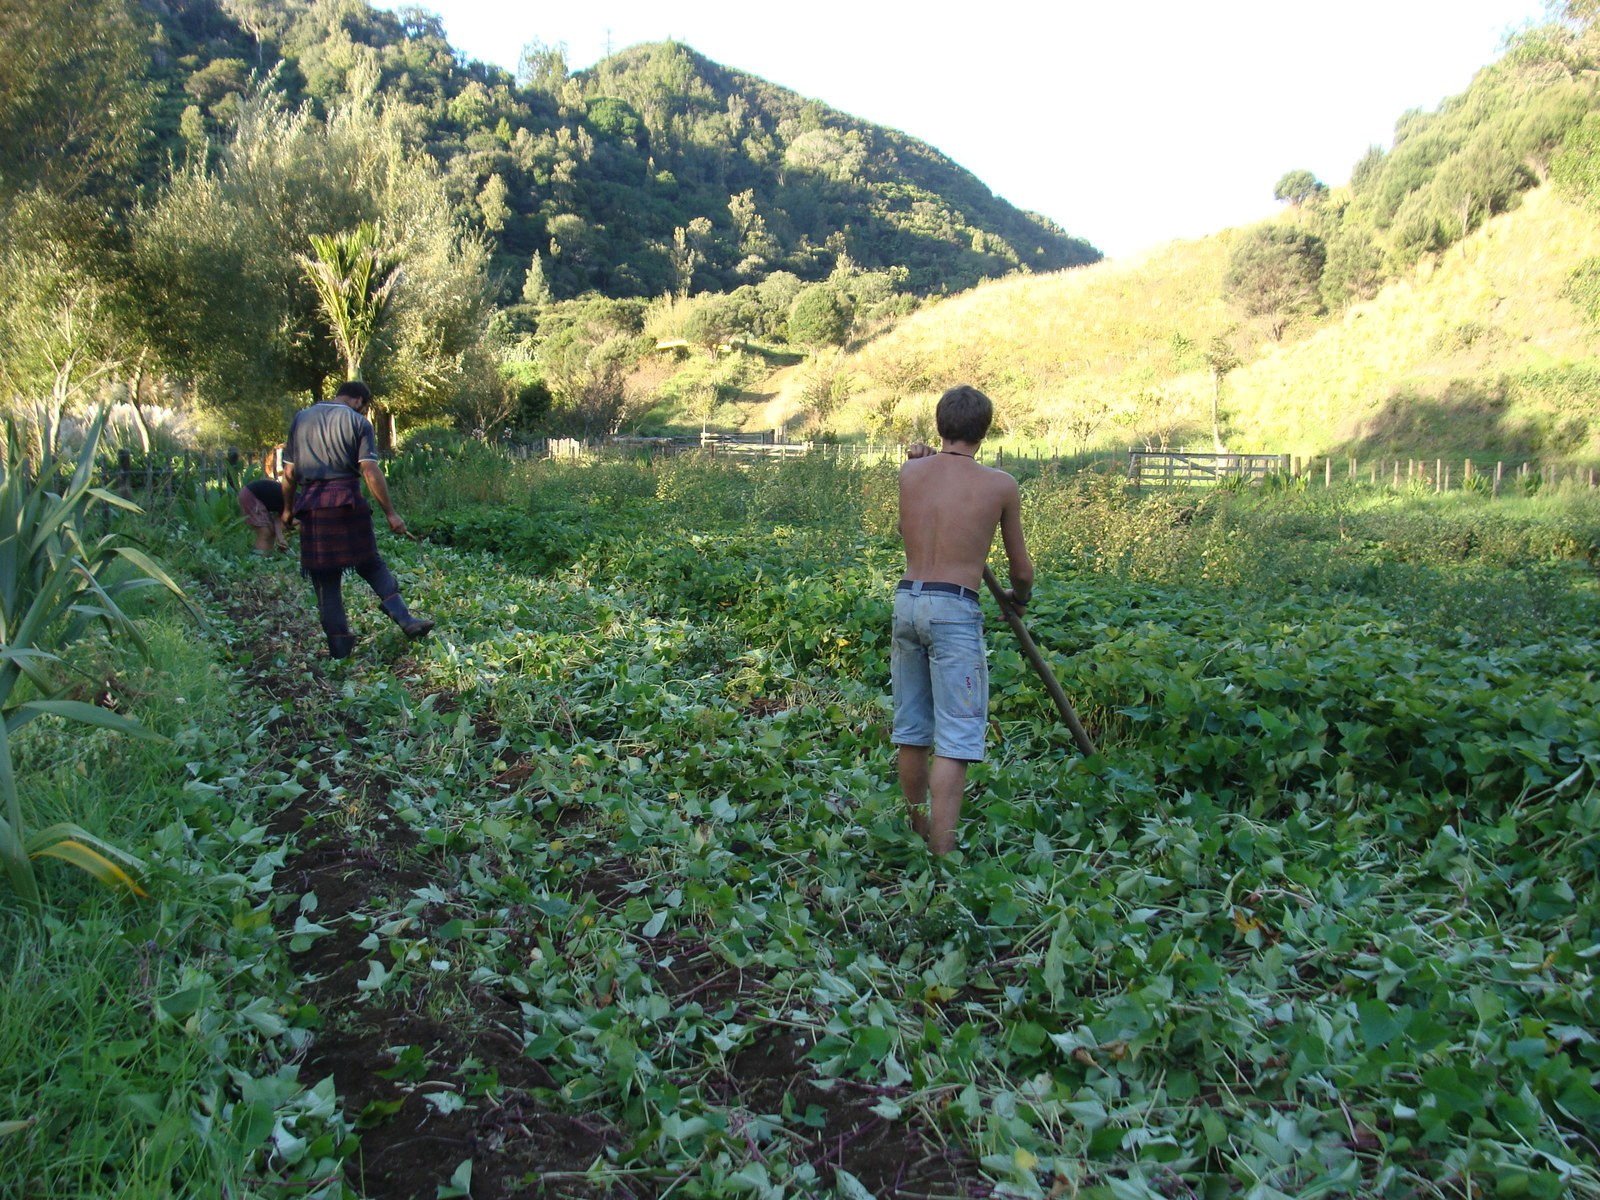 Over the Summer the kūmara tops grow very thickly and spread across the ground to form a continuous cover. Various people have suggested that they should either cut back the runners or lift them to prevent them rooting, but Joseph has experimented with both of these practices and found that neither made any perceptible difference to yield.
Different varieties of kūmara vary in the vigour of their top growth and Joseph is careful not to grow the less vigorous varieties next to the more rampant types. Joseph grades his across the paddock in terms of vigour from small to medium and then most vigorous. Maikio Gold, Poporo and Taputini have a bushier habit and don’t tend to run, so are susceptible to being squashed out by the other varieties.
 Joseph harvests from the end of March. After that the drop in daylight hours and temperature means that tubers don’t really increase in size, and there is a risk of the weather becoming too wet which makes them harder to dry and can reduce their storage capacity. The Lands scythe the tops off the plants following the shape of the ridges and making sure that the main stalk remains visible so they know where to dig. The tops are trampled down into the furrows and left to break down into the soil.
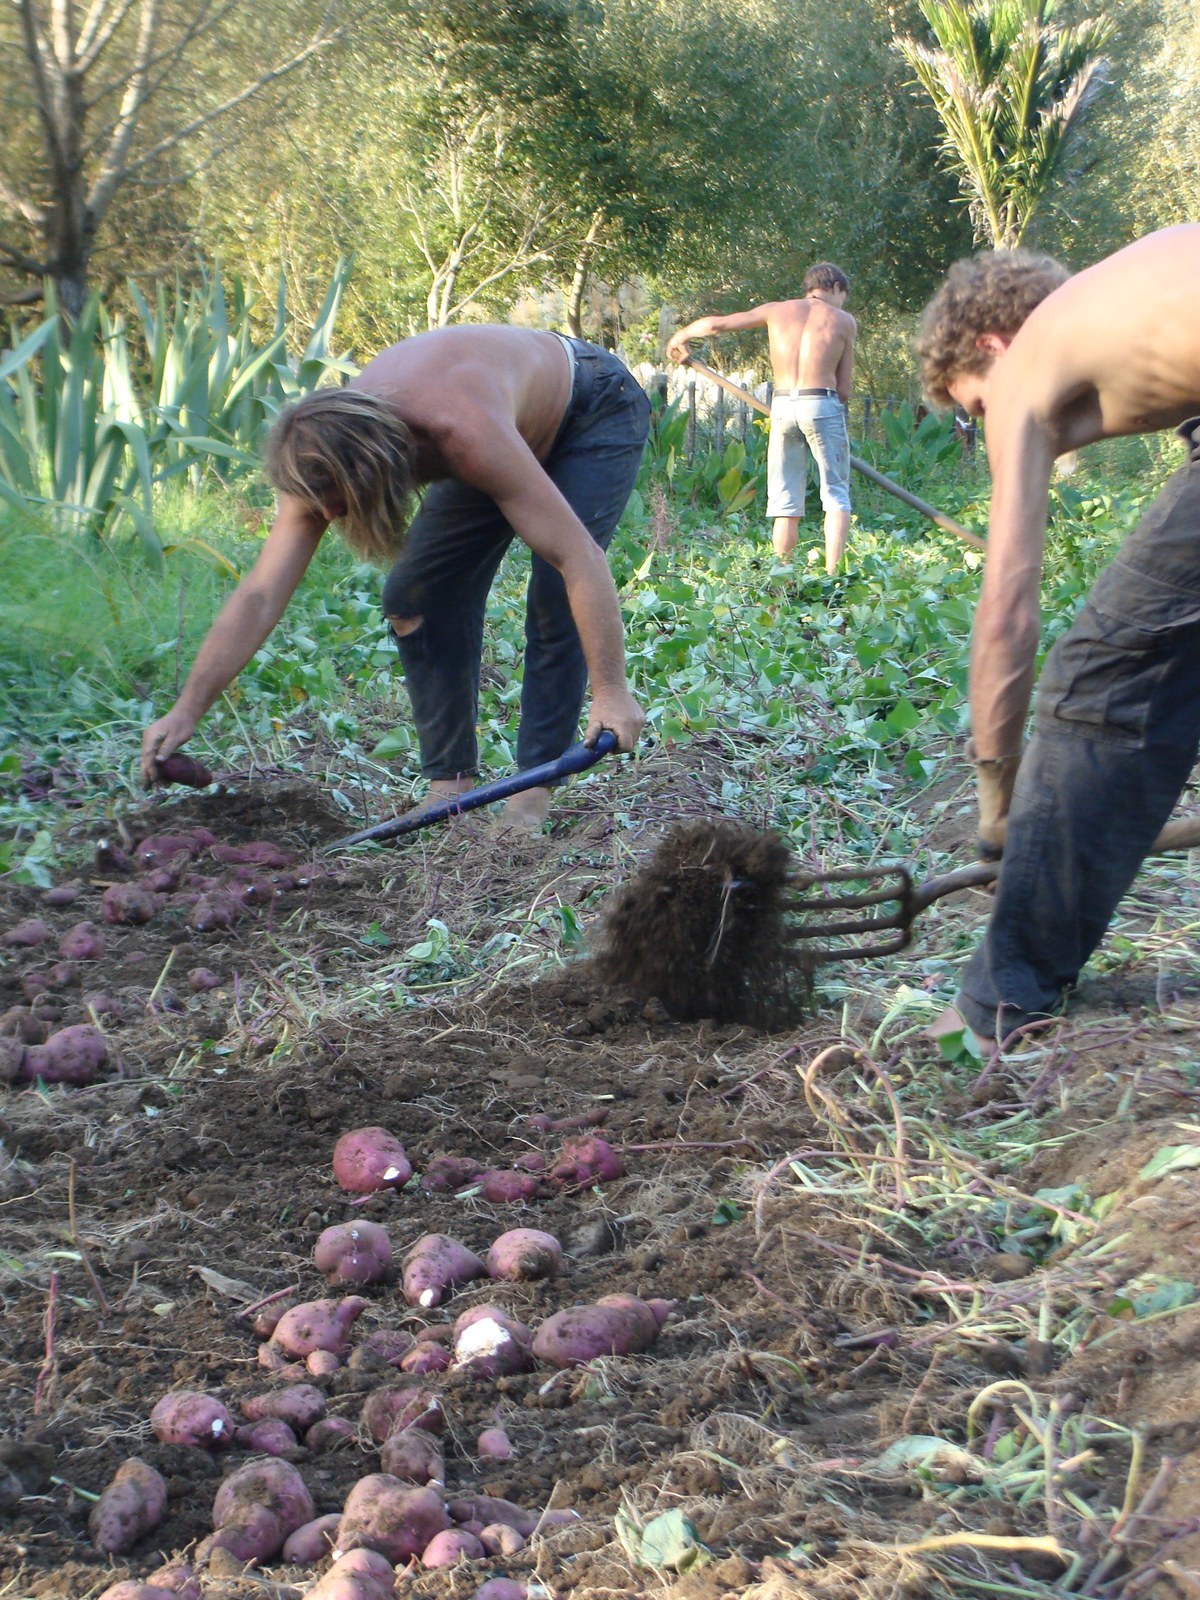 Harvesting the Kūmara takes the Lands two full days. On the day I visited, there were 8 people working (3 people cutting the tops and 5 following on forking the kūmara out of the ground). The kūmara are left lying on the soil and stay out usually for 3 days and nights as it needs to dry out. If its really hot and sunny, Joseph uses a light covering of kūmara tops over the tubers to provide a little shade and to prevent them drying out too quickly on the outside. This year they were totally rained on after two days. Once the rain had stopped, the top side of the tubers dried out in the sunshine for a day and then they turned them over for an extra day so that the underside dried.
Different kūmara plants form differently under the soil. Some clump their tubers mainly underneath the plant, whereas others are spread out across the bed. Where possible, in selecting for seed Joseph chooses tubers from plants where the tubers are clustered below the plant because this makes digging them quicker and easier, and reduces damage to the tubers as they are easier to find in the soil.
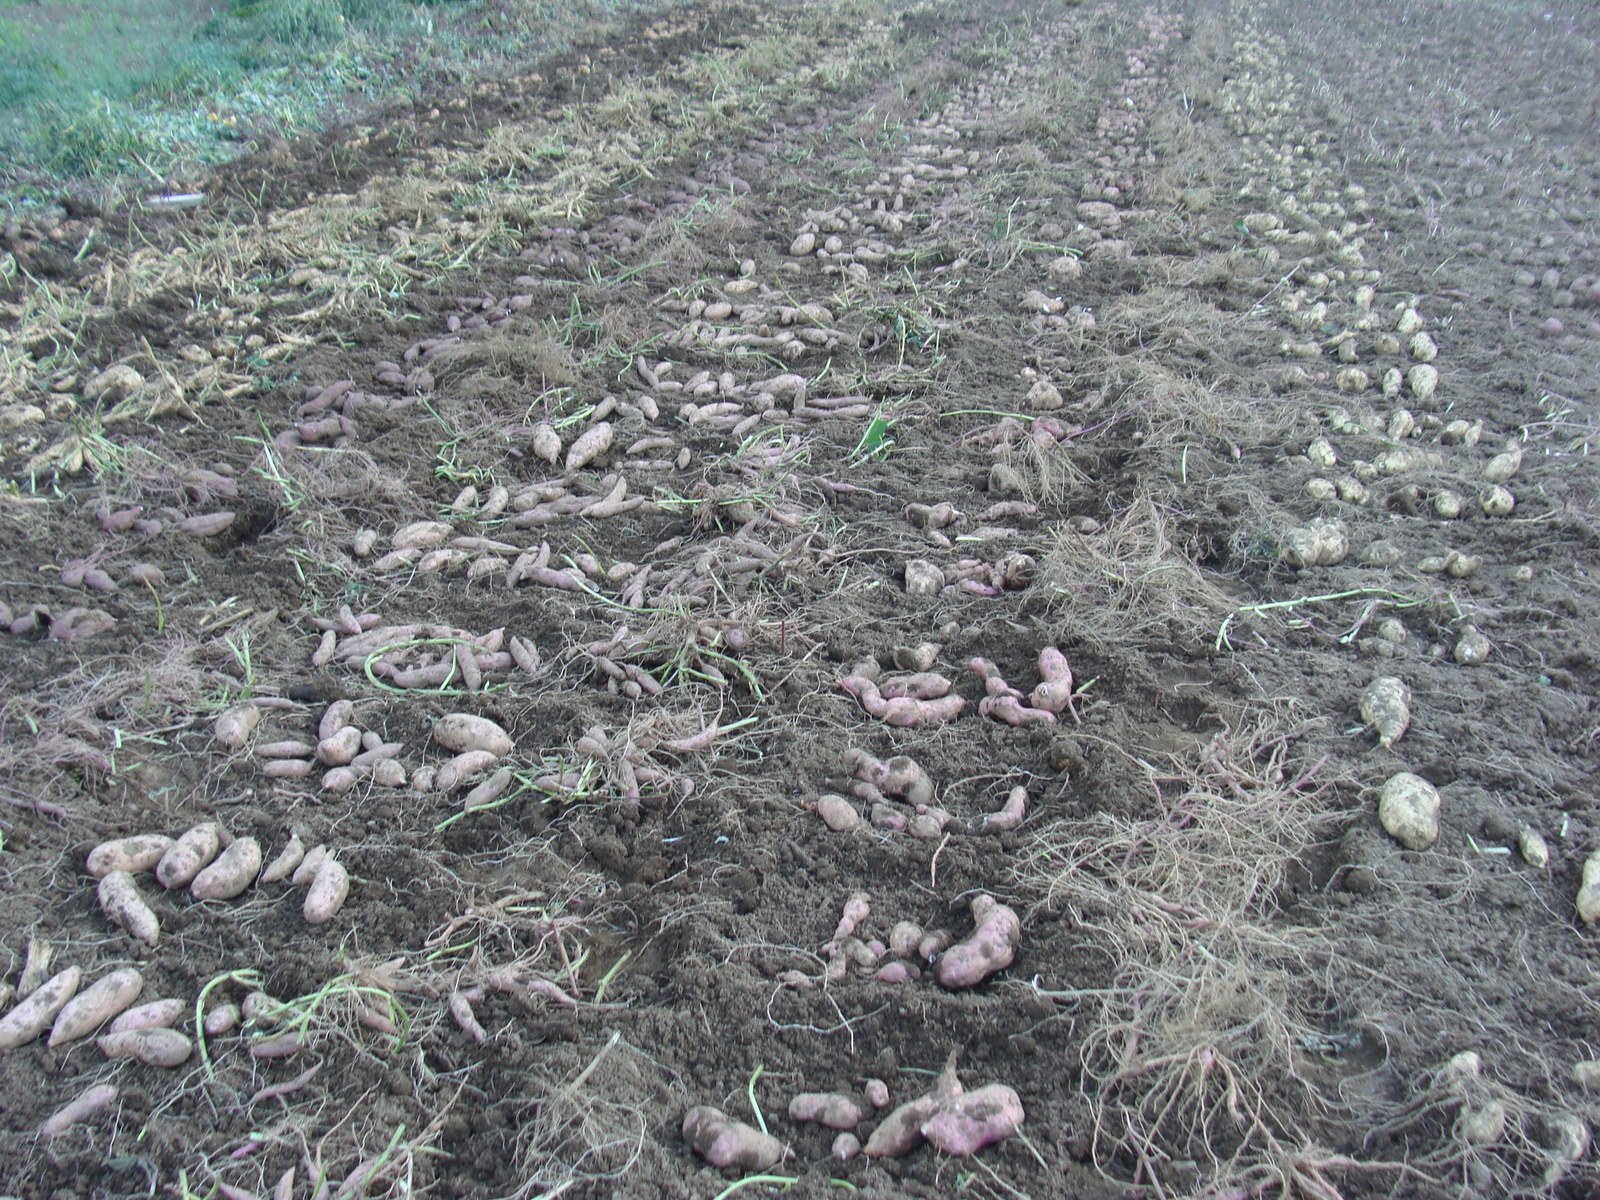 Collecting the tubers after drying takes another whole day. The best ones are selected for seed – not the biggest, but ones with good colour and form for that variety, and with no skin blemishes. The seed kūmara are stored in wooden boxes with dry hay around them to protect them from rubbing against each other and being bruised. The rest for eating are then graded within each variety into large, small and damaged. All the animals love kūmara, so ones too small for keeping are fed to the horses or pigs. The eating kūmara are put into hessian sacks and stored stacked up in a store house.
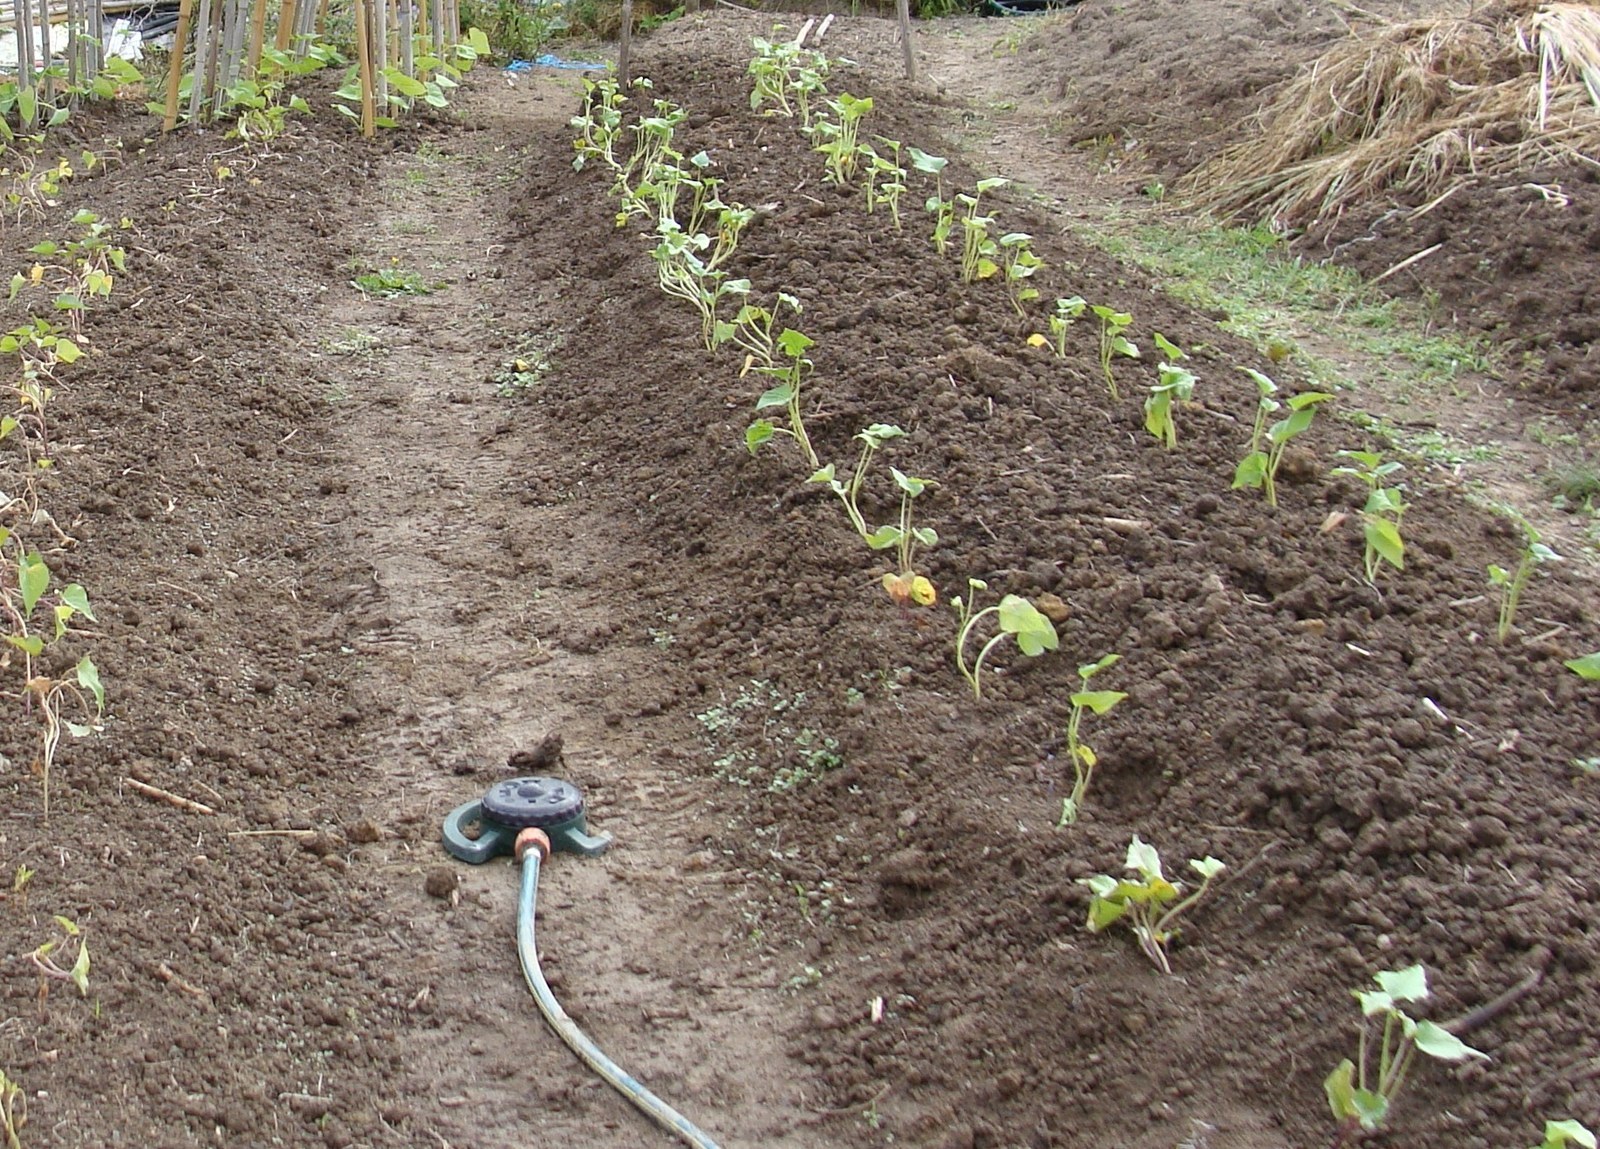 We also grow a lot of kūmara at our place – not anything like as much as Joseph, but enough to keep us well fed with kūmara for most of the year. We grow the kūmara in permanent beds about 1 metre wide in our garden. We mound the soil within the beds and then plant the kūmara in rows along each side of the mound and staggered at about 12 inch spacings. We’ve been obtaining a good yield from growing kūmara this way. We don’t double dig the beds before planting kūmara as the advice from Kay is that kūmara needs a pan below it to start forming the tubers, and if the beds have been deeply dug then you get heaps of top growth but a poor harvest of tubers.
Harvesting is slightly different in our situation too. We’ve found scything the tops off difficult due to the shape of the beds, and prefer to use hand tools such as sickles or garden sharks. After harvesting we plant the beds with lupins for the Winter so we remove the piles of foliage and add them to our compost heaps. We also utilise our kūmara tops throughout the Summer either through cutting back runners to give our house cow a treat while being milked, or for us to eat. We’re particularly partial to them used as the greens to go with homemade paneer for a kind of palak paneer.
Happy Growing!