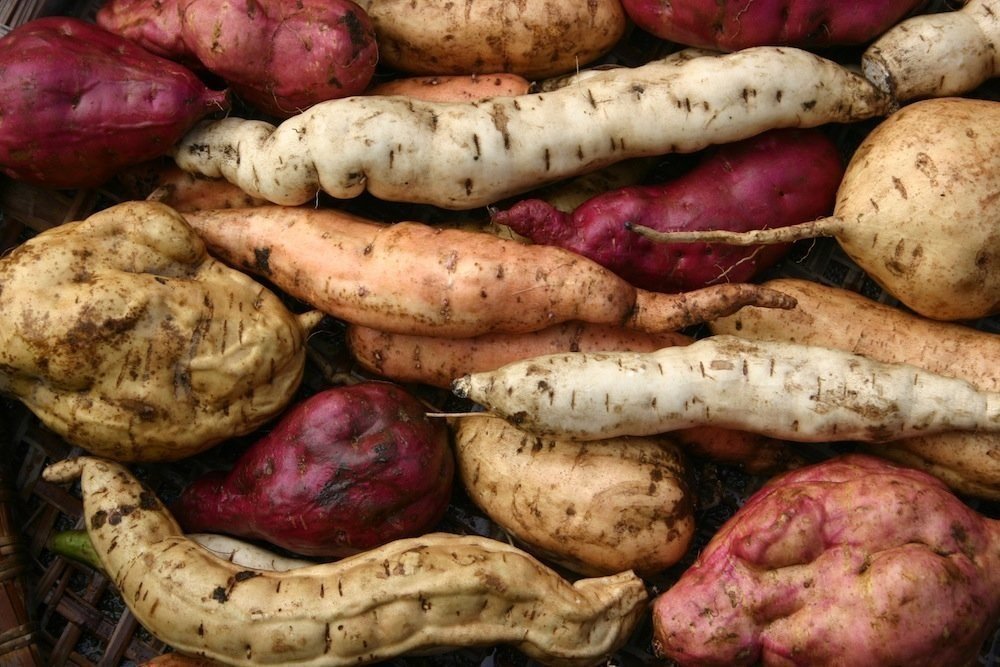
Kumara are one of our main staple crops and a huge favourite for us. For most people who buy kumara their choices are limited to either gold or red but Koanga has a range of pre European and early commercial varieties which range in colour from red, through dark pink, orange, golden, pale pink to white. As well as varying in colour the leaf shape, growth habits and flavours also vary with some being sweeter than others.
Up here in the Hokianga our climate is well suited to growing kumara and we’re not far away from one of the major commercial kumara growing areas down near Dargaville. Kumara needs several (at least 3.5) months frost free to produce a good crop so is harder to grow in the colder areas of New Zealand although we do have varieties that came from around the country including Bay of Plenty and Marlborough.
In a previous article I explained how our kumara grower, Joseph Land, grows his kumara but here I’m going to share how to grow kumara on a smaller scale.
Growing the tupu or slips
The kumara growing season starts when we plant our tāpapa bed in August. A tāpapa bed is a kind of nursery bed for growing the tupu or shoots (also known as ‘slips’) that will be planted out. When sorting the previous years crop we selected a number of good, healthy tubers of each variety and wrapped them individually in newspaper to store them. We usually put 2 or 3 of each variety into our tāpapa bed which means the bed is quite large but if you want to have a go at growing a few for yourself you just need a deep wooden box. They need warmth to sprout so if you are in a colder area or just want them to get going quickly then putting a layer of horse manure and then grass clippings at the bottom of the box will provide bottom heat as it rots down, a layer of sand is then needed, and then a thick layer of silty/sandy loam or of sand mixed with a little potting mix. Bury the kumara, spread out and not touching each other. The box can then be kept in a greenhouse or tunnel house for extra warmth and also covered with a sheet of glass or plastic. Keep the growing medium moist but not wet, check it regularly and after a few weeks the tupu should appear. Remove the glass or plastic at that point. As our tāpapa is large and outside we put hoops over it and cover with plastic.
Preparing the beds
While we are waiting for the tupu to appear, which takes a few weeks, we prepare our beds. Kumara need light/ sandy soils which have not been too deeply cultivated. We plant our kumara in beds that are about 1 metre wide and we shape the bed so a mound runs length ways along it. Traditional additions to the soil were baked ground shell, seaweed, and woodash. We also use compost and Nature’s Garden fertiliser.
Picking the tupu
Once the kumara tupu have appeared in the tāpapa bed and have reached a decent length (at least 15 cm above the ground) they are carefully removed from the buried kumara (leaving it in place as it will produce more tupu). The tupu should have roots on them and at this stage are quite vulnerable so it is important that they do not dry out. I stand them in the shade in a bucket with their roots in water until we are ready to plant them. Tupu that are sent out from Koanga have their roots carefully wrapped in damp newspaper covered with a (bio degradable) plastic bag.
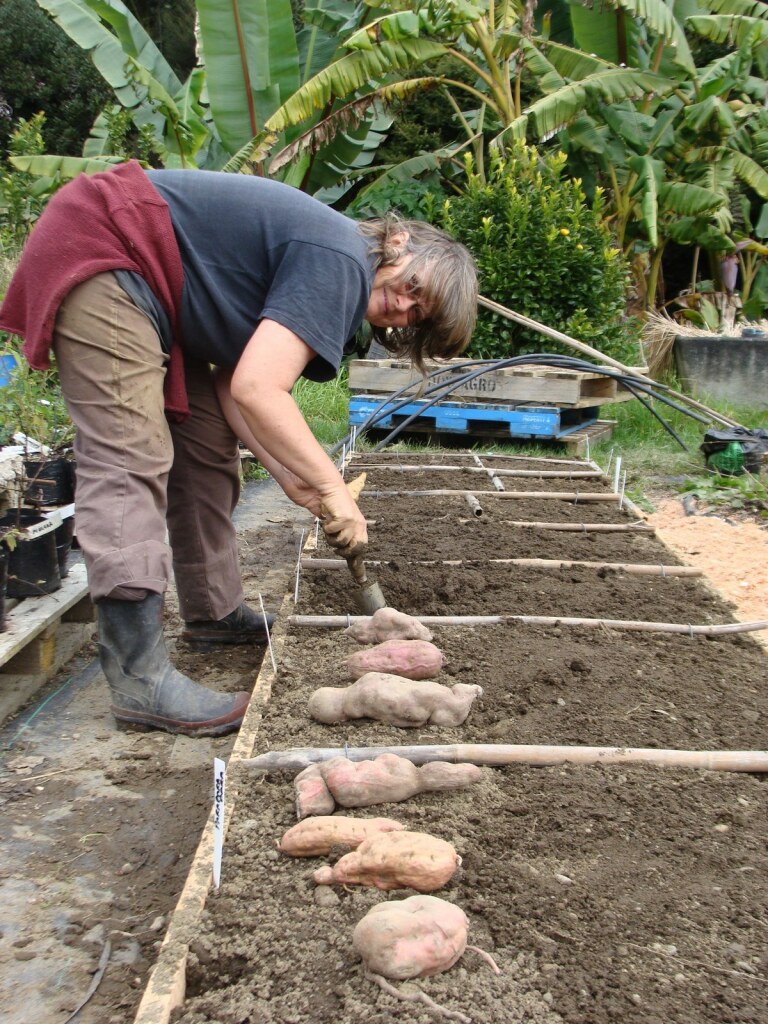
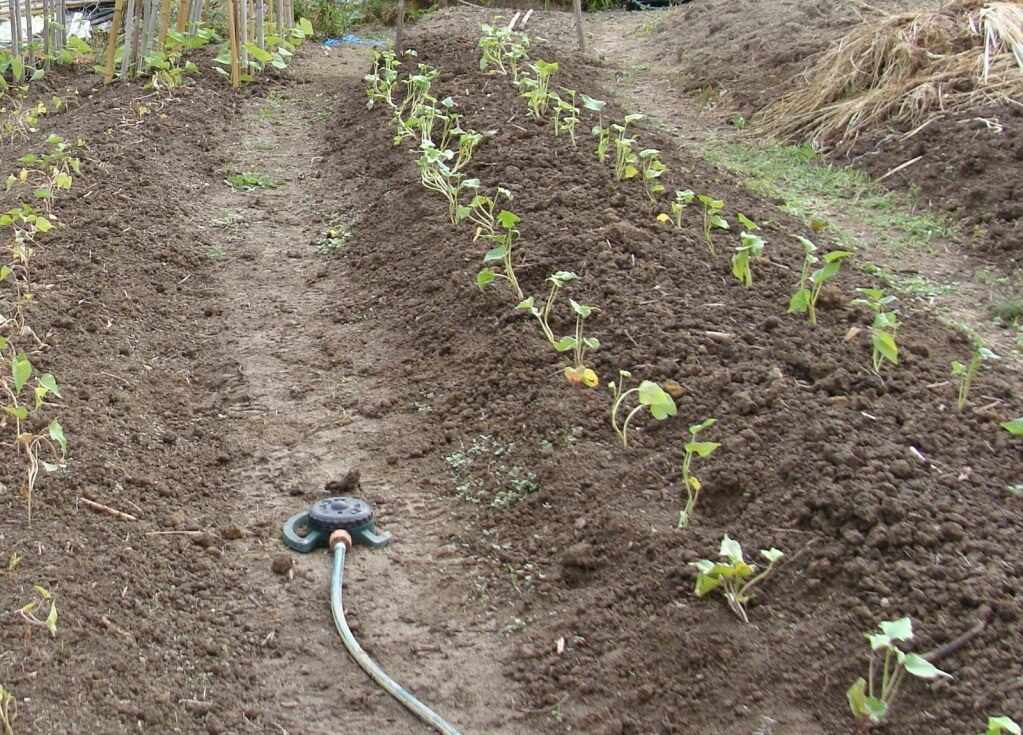
Planting out
Kumara do not withstand frost so, if you live in an area that is marginal for kumara growing and late frosts are a possibility then hooping the beds so that plastic or frost cloth can be put over could be a good idea. Remember to check under the cloth or plastic regularly, keep the bed moist and remove the cover completely once the danger of frost is over.
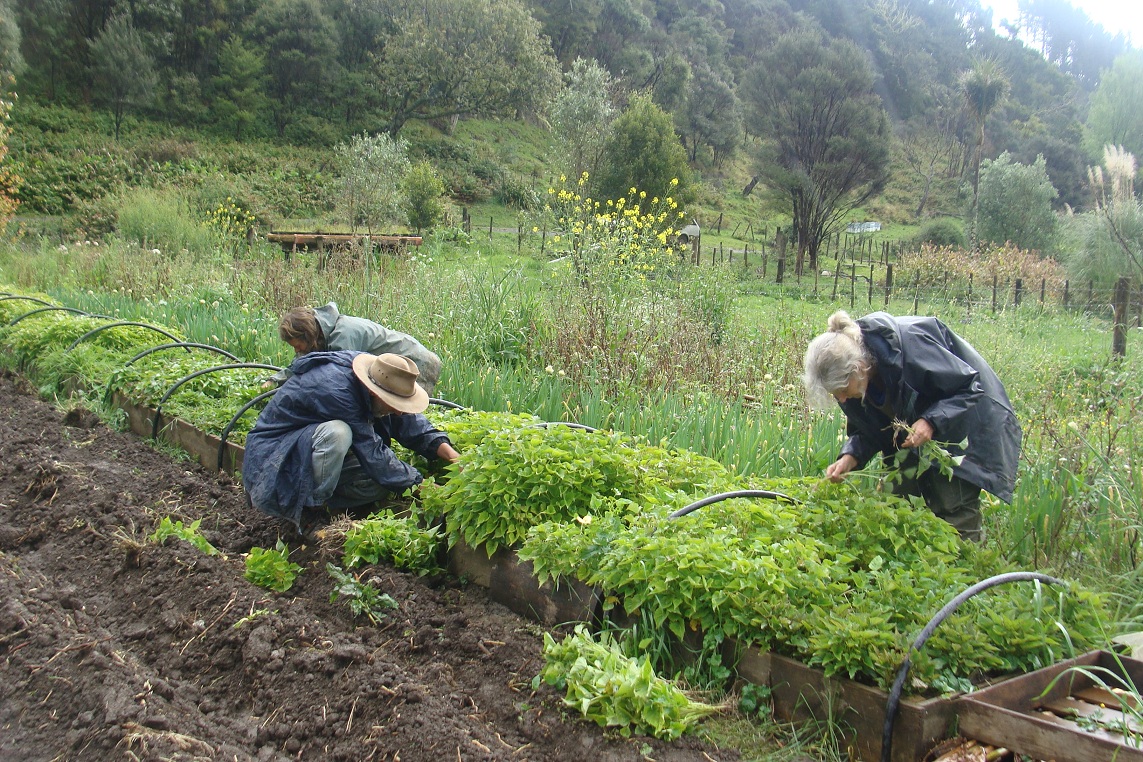
The other thing that Gail and John do is to cardboard and sawdust the paths to keep them clean and free of perennial weeds which can hide under the kumara foliage.
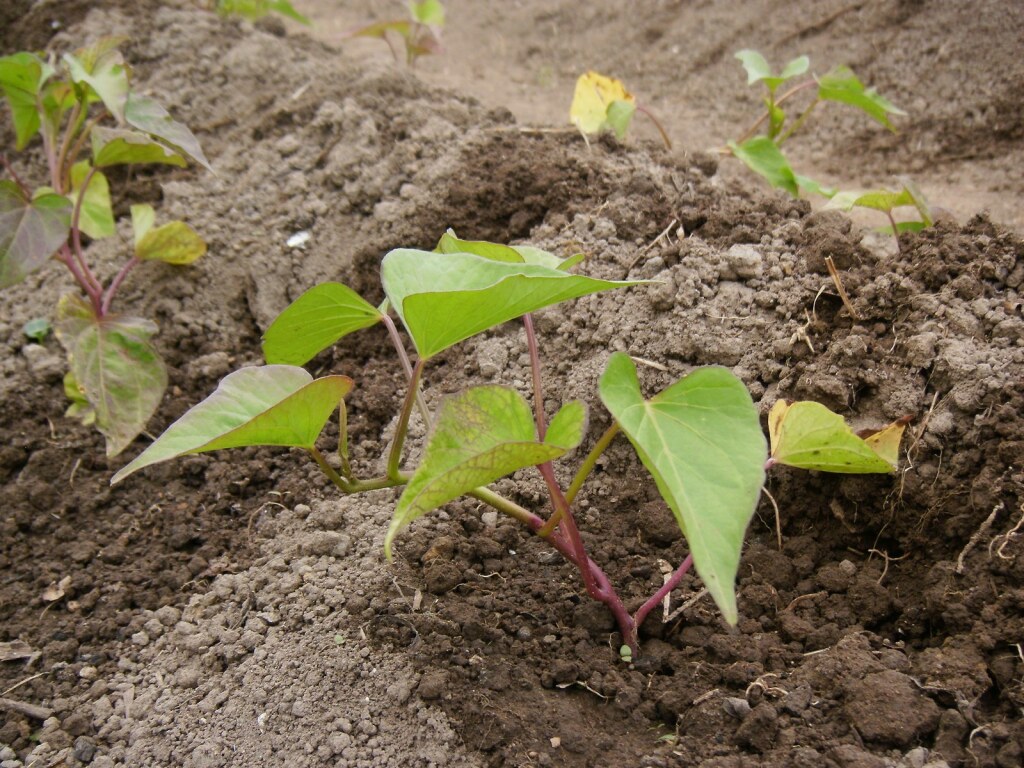
We then plant the kumara tupu in two rows, one on each side of the mound, at a spacing of about 12 inches along each row. We stagger them so that the tupu on one side are positioned opposite the middle of the space between two on the other side. We plant the tupu so the roots and part of the shoot is well covered and the leaves out of the ground. As they are planted on the sloping side of the mound we shape around each planted shoot to catch the water. We water them well and keep them watered for the first few days. Over the first few weeks, while there are still spaces between the plants, I remove any weeds that appear. Eventually the tops cover the whole area and require no significant input until harvesting.
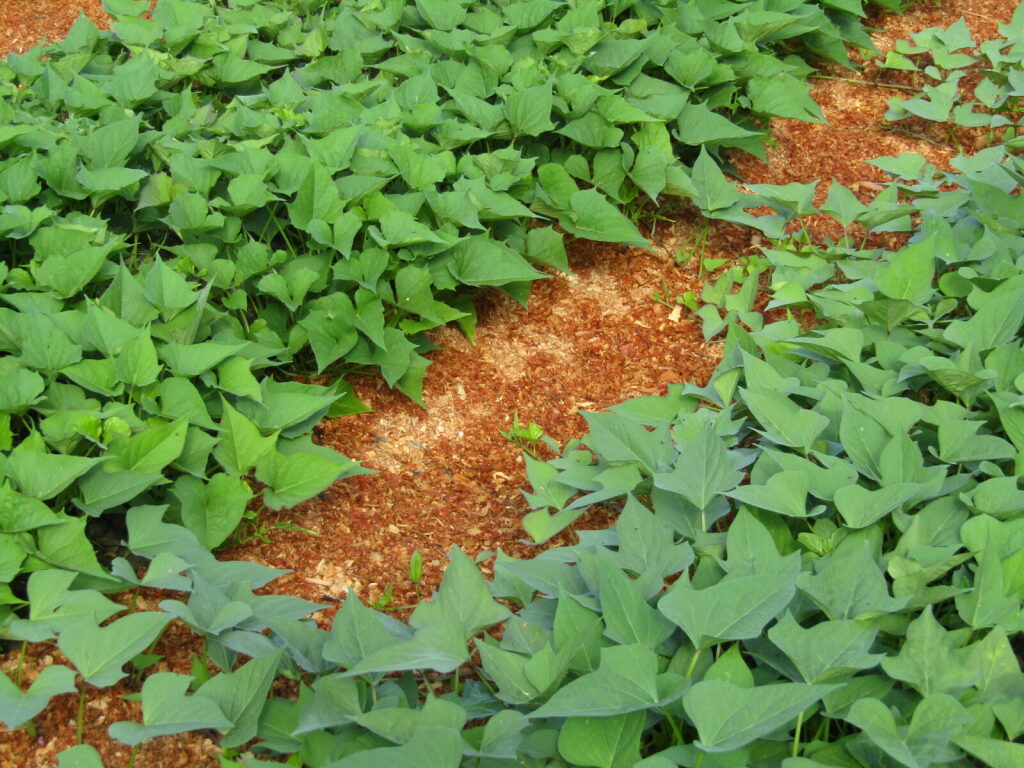
The only significant action required during the growing season could be to water if the plants wilt during a prolonged drought. We have never needed to do this.
Harvesting
Kumara needs to be harvested before the first frost so harvest time is determined by where you live. Up in the Far North we usually start in April but can reliably leave it until May with no danger of frost. Dry weather is needed for harvesting as the kumara need to ‘cure’ in the sunshine before putting away into storage.
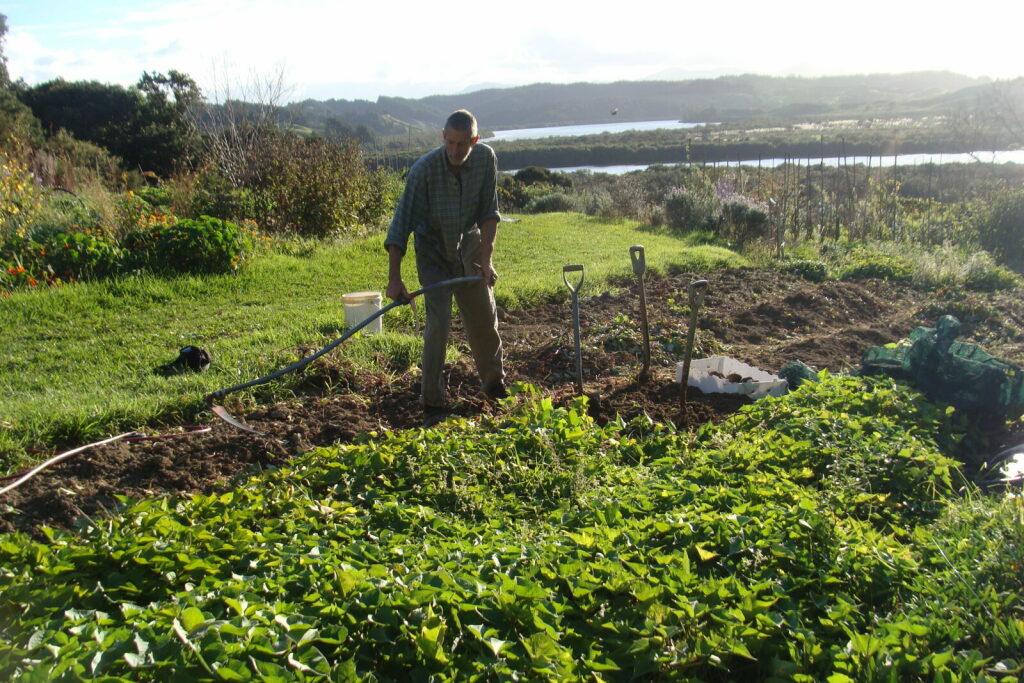
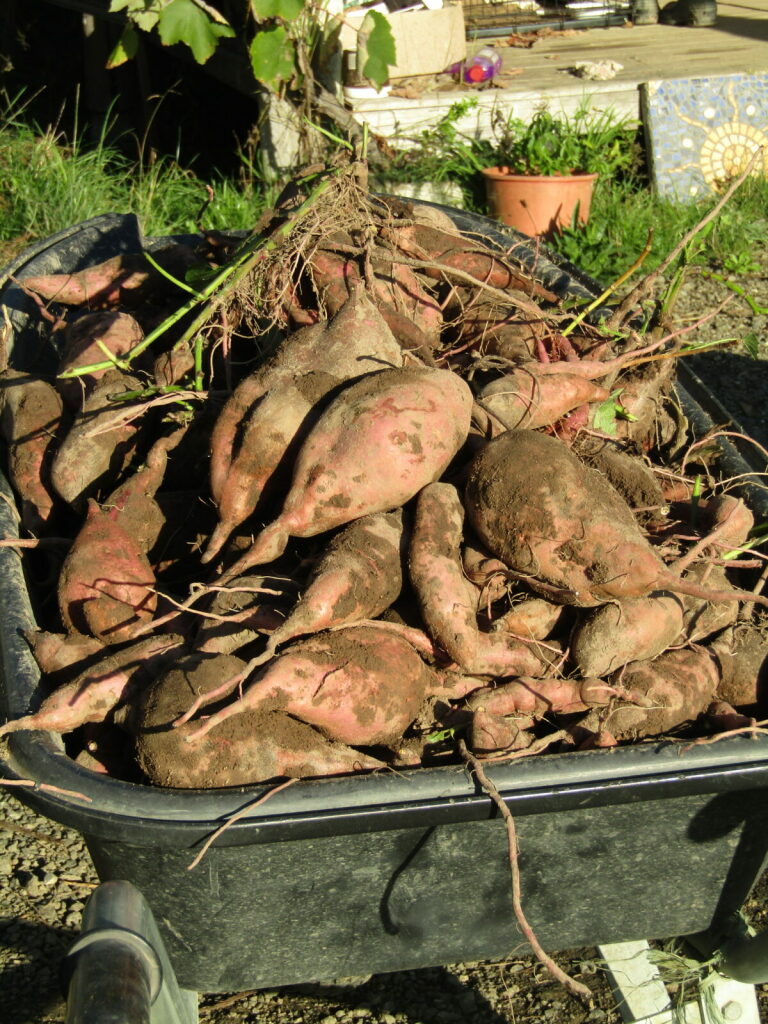
We try to harvest after the full moon and begin harvesting by scything the tops off the plants. I’ve heard people say that they can’t harvest because the tops haven’t died down but they need harvesting before the tops die down. Incidentally the tops are good food and can be used in soups or stews or cooked like spinach. They are also good stock food and our cows and horses love them. At harvest time our milking cows have them as their daily treat during milking.
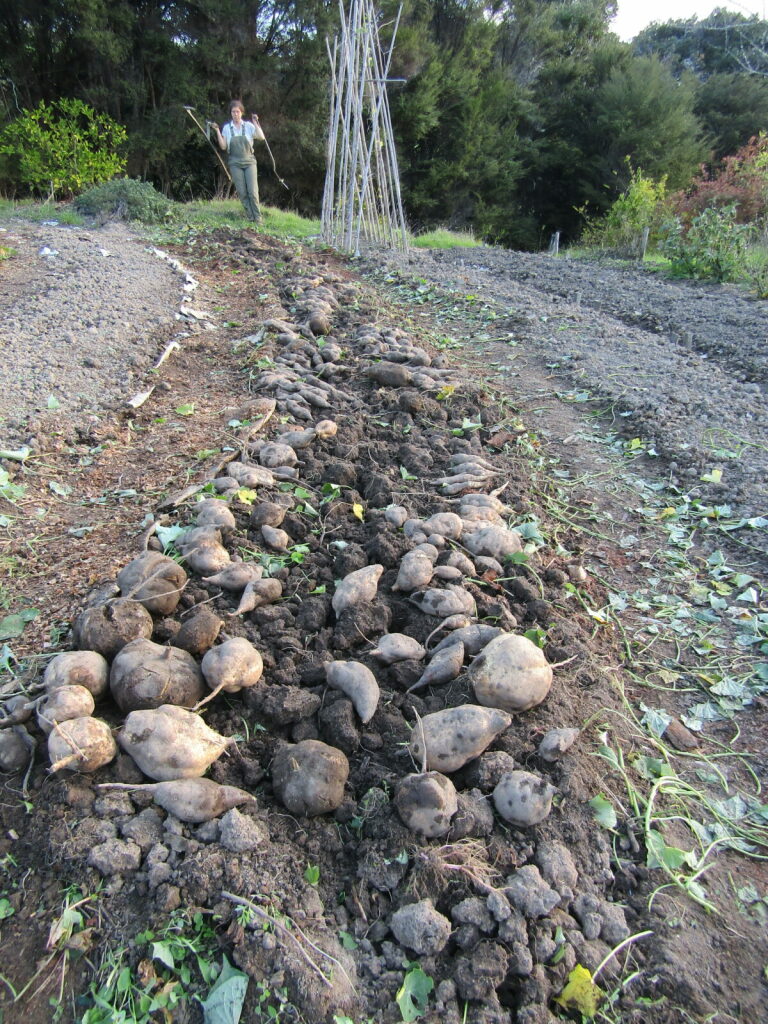
Once the tops are removed we harvest carefully from one end of the bed using a garden fork. It is very important to harvest carefully and methodically to avoid damaging the kumara as damaged kumara do not store well. As we harvest we lay them on the section of bed already cleared to cure in the sunshine. Many people will leave them on the bed all day, cover them with the tops at night and uncover them the next day, and then keep doing that for a few days to cure but we can’t do that. We have many quail around which just love kumara so we can’t leave the kumara lying on the beds when we are not around or the quail will literally hollow them out. So after we harvest each batch we spread them out in a shallow box and move them to a quail free place! We could cull the quail I suppose but they wander happily around eating weeds, seeds and some bugs and do no other damage so we’re happy to let them be and alter our kumara curing system.
Storage
After harvest we grade our kumara. Our seed kumara for the next year is selected from the very best tubers that are a good size, unblemished and undamage. These we wrap individually in newspaper, label and store in a box. The box is labelled “Seed kumara DO NOT EAT” for obvious reasons and kept in a cool, dry place where rodents can’t get to it.
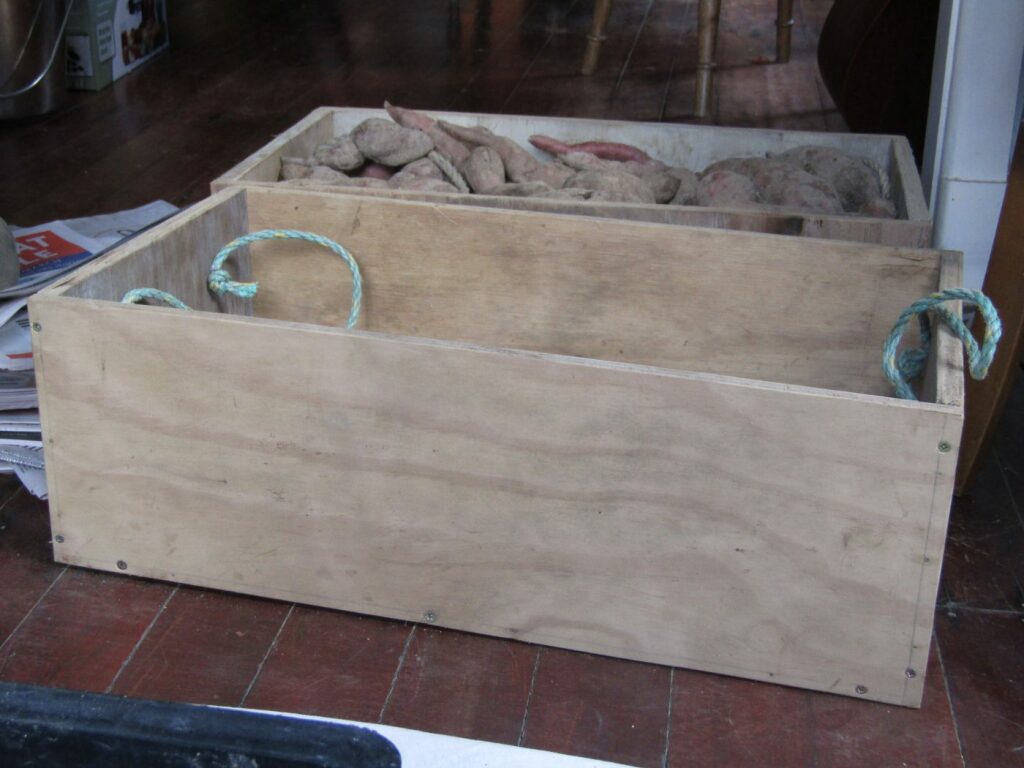
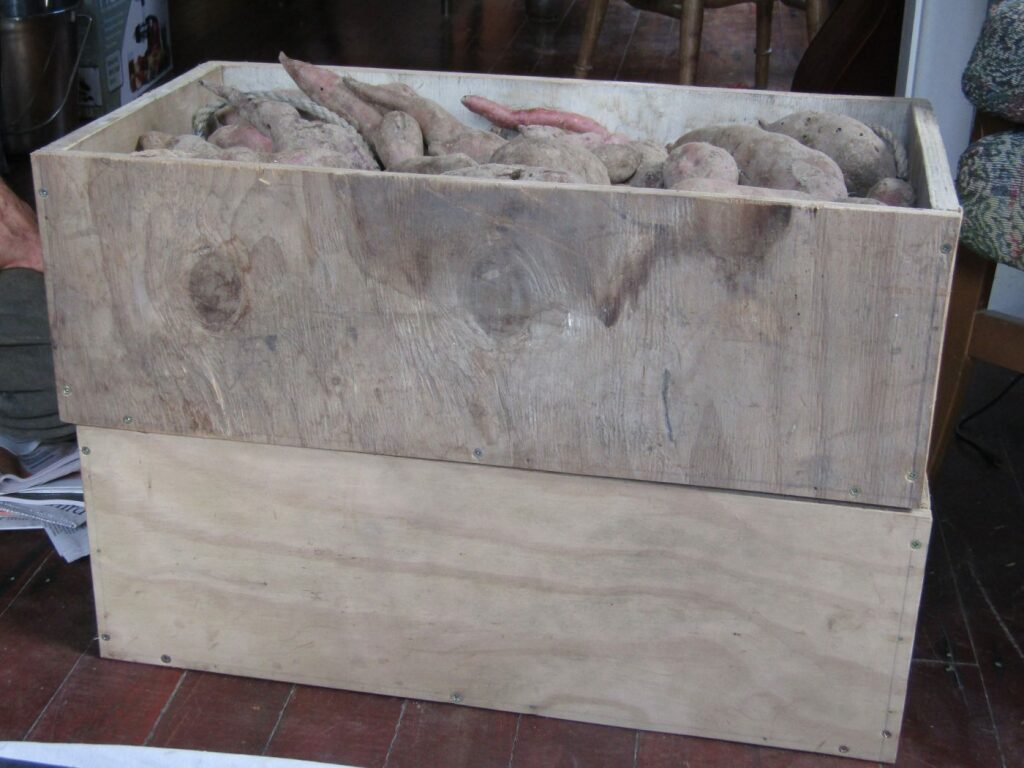
We used to store our kumara in cardboard boxes but rodents are quick to learn and each year we experienced more and more damage as the rats would eat their way into the boxes. So a couple of years ago John made some storage boxes out of eco-ply (untreated and no nasty glues) and that is working a treat. The boxes stack and John made a lid for the top box and so far the rodents haven’t managed to get in. This has made a huge difference to us and this year we finished eating last year’s kumara just as we started to harvest this year’s crop. No kumara gap feels pretty special!
The rest of the good sized, undamaged kumara is to be stored for eating later in the year. Traditionally they were stored in layers with silver or bracken fern leaves (that have anti fungal properties) between layers. Some people store them in boxes with fern leaves or dry hay between layers but we find the easiest is to wrap them individually in newspaper and store them in the plywood boxes. Stored this way they keep for months.
Any small, damaged or split ones become our ‘use soon’ kumara. We used to store those in sacks but it was hard to keep the rodents out so now we store them unwrapped in the boxes and check them regularly. The final category would be small or damaged tubers that are too small to bother cleaning for cooking and those we feed to our birds – the ducks in particular really like them.
It’s not good to grow kumara in the same beds the following year so rotate them around your garden as you do other crops. If you do start to get lots of holes in your kumara then try a sowing of mustard as a compost crop before the kumara goes into those beds.
If you haven’t grown kumara then I’d recommend it as they are a fantastic crop. If you’re not sure if kumara will grow in your specific area check with other gardeners locally and see if others have tried.